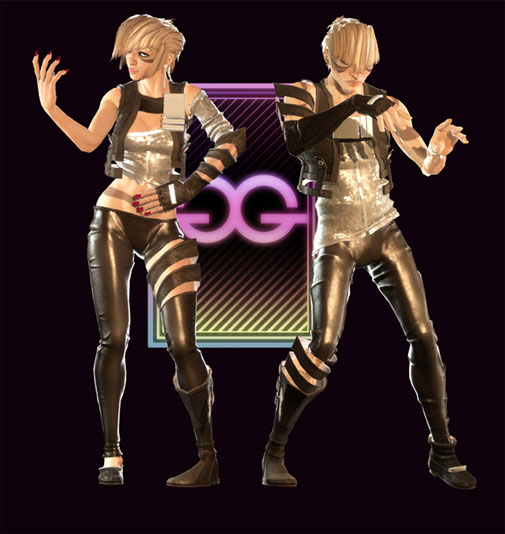
Dance Central 2 – Kerith & Jaryn (The Glitterati – Crew outfits) [COS]

(Check out Glitterati costume page for more photos!)
When Nate and I realized we loved the Glitterati and their ridiculously amazing outfits, we knew we would definitely want to try our hand at the Street Style ones since we weren’t sure how we would tackle the crew outfits. We weren’t necessarily planning on even trying the crew ones but after finishing the SS ones we knew we wanted to try our hand at them. Our love for Kerith & Jaryn trumped the HOW DO WE MAKE THESE FRICKIN’ THINGS?!?! — we figured out that we would find a way somehow so we planned to have them ready for Dragon*Con 2012! We got them finished just in time (we actually finished a couple of things at the hotel at con haha) – there are a few minor adjustments we want to make (which we will get to in the post) but we’re really happy with how they turned out! 😀
Since both outfits are very similar, we’ll go by outfit piece instead of by character like we did with the Street Style post!
PANTS:
These were the easy part. The only really easy part, hehe. We both bought leggings that were labeled “liquid latex” – we thought that looked close to the design of their pants without being made of vinyl or leather or something of the sort (you know how I feel about sewing vinyl – I made a second Jaryn street style jacket with something that wasn’t vinyl – check out the new photo in our recent post! XD). We cut the pants where they needed to be cut (mine on the thigh and his on the lower leg) and we took his in some since they were baggy on him. With the piece I cut off of Jaryn’s, I sewed some elastic into the top of it to see if it would stay up on its own on my thigh. It doesn’t – so there’s one thing that needs to be fixed! The spiral bits that stick out from her thigh and his lower leg, we’ll get to those in a bit!
BOOTS/SHOES:
Since they each wear one boot and one shoe, this required four pairs of shoes between us. I had an old pair of boots I wasn’t using for anything, so my boot was taken care of – I could glue anything to it and would be fine. Nate’s boots were boots he used for other costumes though, so for the additions to his boots (errr, boot), his had to be something he could add to the boot and then take off when needed. I found a pair of flats like Jaryn’s shoe at a thrift store and Nate found a pair of shoes like Kerith’s on ebay. We wanted the silver additions for the two shoes to be removable too since they were both shoes we could wear for other things. The silver additions were pieces of bent metal attached to elastic. The additions for the boots were strips of the same vinyl-type stuff we used on the vests with the same size grommets used in as the vest on the ends as well. The strips were glued to the side of my boot while we managed to cobble together a thing that looked the same except with a circle of black elastic so Nate could put it around his boot.
WIGS:
I realized we only briefly touched on the wigs in the Street Style entry! We both started out with Blue Steele wigs in ash blonde from Arda Wigs and we were planning on cutting them super angular in the front like Kerith & Jaryn’s haircuts. We realized, as we were working at the last minute before Katsucon (where we first wore the SS outfits), that whenever we moved and the hair moved and it didn’t look right anymore. So we ended up kind of blunting the edges on their haircuts a little to make it look more “normal” – we also tried spraying it so it would stay while it was angular but it made the wigs look hard and weird. We washed the spray out and tried to make them both look more natural.
The Kerith wig was easier than the Jaryn wig because it was mostly just cutting the bangs (which is how we managed to do it the first day we wore the costumes, haha). Jaryn’s needed the side pieces as well as all the tiny, shorter pieces of hair that go from her temples to the point in front. Her bangs/the main point sticks out farther and up a lot more in the game than this wig but trying to keep it that way meant spraying it so I just cut the point and then tease it up a little at the top whenever I wear it. Sometimes it cooperates and sometimes it doesn’t. But the wigs are comfortable and they work! XD
We’ve worn the wigs so much now since the Street Style costumes originally debuted that Nate’s Kerith wig has a small tear in the band. He’s been working so hard at being sassy that he busted his wig, y’all.
OTHER SMALL BITS:
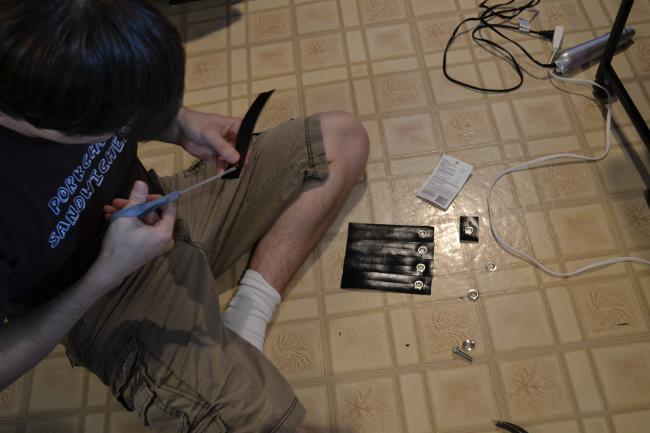
Both pairs of earrings were made by Nate out of clay – mine were hooks and his were clip-ons. He also cut out the silver shapes that went on the front of the vests. He measured and cut them out of gray craft foam with an adhesive backing then I painted them silver. Finally, he stuck them onto a piece of a cheap thin clear vinyl shower liner we bought so they would have the spaces in between them and I added some hair clips to the back so we could clip them to our vests and remove them easily if we needed to.
The gloves were a single pair of black liquid latex gloves we purchased (since they wear theirs on opposite hands we only needed to buy one pair, wooo!) that we cut the fingers off of and added silver bits too. To give it the raised look we attached the same type of metal we used on the silver shoe additions to pieces of craft foam and then attached those to the gloves. Mine was cut shorter than his since I needed room for the spiral piece on her lower arm.
The black spiral bits were the parts that gave us the most trouble. It was one of those cases where you look at the illustration and you think THAT LOOKS SO AWESOME HOW DOES IT STAY LIKE THAT then you try to think of a bunch of ways to make them stay and none of them work. We finally settled on fabric with wire sewn into the edges. The fabric on the spiral pieces looks different than the fabric on their pants & vests so we used a shiny, black material that had sort of a raised pattern. We made them and didn’t bend them for the first time until we put the outfits on at Dragon*Con. The arm ones are fine but the leg ones give us trouble so there’s the other thing we need to fix!
Now for the big parts!
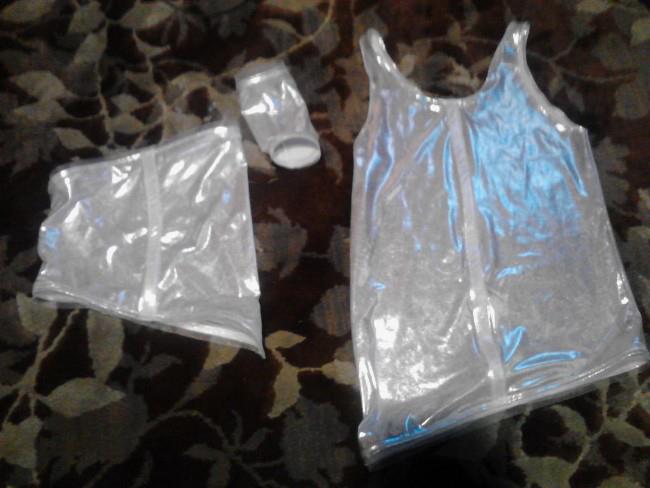
SHIRTS:
These shirts were a trip for us to make. Usually, we can find patterns to use and modify and we’re okay with that (we’re not the best with sewing machines, haha! XD), but we could not find a good pattern to modify for Jaryn’s shirt. For Kerith’s we used an old tank top Nate had. We cut the tank top apart and used it as a pattern, cutting the silver shirt fabric out longer and at an angle along the bottom. For Jaryn’s I ended up fiddling around with a mockup made out of another stretchy fabric we had and just kept modifying it until it worked! I used that as the pattern for Jaryn’s and then cut it out of the silver shirt fabric, then sewed them both to become actual shirts. I added clear straps to mine just in case it didn’t want to stay up.
For the white detailing down the front of their shirts and around the edges, we found a white horsehair braid that we thought might work. It’s normally used for other things like stiffening hemlines and such, but we thought we could use it as the detailing on the shirts. We didn’t want to get something too delicate or hard to see but we didn’t want to get something that would stand out too much, either. Luckily, this stuff worked out perfectly!
VESTS:
The vests are our favorite parts of these costumes because we took so much time making them and put some thought into how they would work so this paragraph might ramble a bit, our apologies!
We started out with muslin and a vest pattern (the same one we originated with for Nate’s Street Style Kerith outfit) and patterned out one that would fit him and one that would fit me. From there, we measured/took in/fiddled with the muslin mockups until we were satisfied with the fit and look. The first idea we had was to use a black vinyl (here we go with the vinyl again! although, these wouldn’t take much to sew – it wasn’t a whole jacket again, so I was fine with it!) we found and line it with a black lining. We were going to be putting something in between the vest and lining so we thought this might work out. The first vinyl fabric and the lining we had weren’t working out, so we had to go on a hunt for a different fabric!
I ended up at a fabric store I don’t normally go to because it’s farther away than our normal haunt, and I found a table full of tough, thin, outdoor vinyl for $5 a yard. I also found a roll of really swanky vinyl for about $18 a yard. I told the girl at the cutting counter when she said, “you know there’s cheaper vinyl on that table, right?” that I needed to line it in black somehow. She showed me black interfacing and told me to use it as lining, told me how to put it on the inside of the cheaper vinyl without melting the vinyl and I thanked her profusely for all the money we saved. I knew our original plan of putting something between the lining and vest wouldn’t work out then, but at that point, I wanted to just get the vests together!
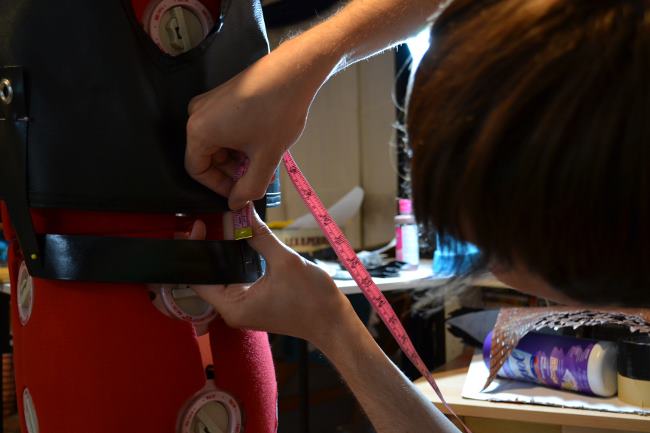
So we used the muslin mockups to cut the vests and interfacing out of the newly purchased stuff and found the stencil of the Glitterati logo we had made for the back of the vests. Nate used his Xacto skills and cut the logos out of the backs of both of our vests. We ironed the interfacing to the vests (left the logo on the interfacing for now though, so that the vinyl middle parts of the GG’s wouldn’t flop around and get messed up while we sewed everything). I sewed all the seams of the vests together and sewed on the thin black trim around the edges and armholes of both. While I did that, Nate measured the thicker strip of vinyl we had, cutting out the pieces that would be attached to the bottom, along with all the pieces that would hold the bigger piece on. He also added the grommets to the tops of all of those pieces.
We put the vests on the dress form, one at a time, and measured the five pieces of vinyl, pinning them onto the vest so they were all the same distance apart and where they needed to be to hold the bigger piece on the bottom. Once all the pieces were pinned, I sewed each of the five pieces (ten in all for the two vests) at the top so they stayed on the vest and at the bottom so they stayed on the bigger strip of vinyl around the bottom. We looked at the picture of Kerith & Jaryn closer (again… we looked at it so many times) and discussed the small pieces of vinyl that seemed to hold the places I had just put together. So I took what we had left of the thin black trim and cut 20 small strips out.
I laid the vests out and glued each piece over the parts I had sewn, making it appear that the strips were being held up by these small loops of vinyl. It took a good amount of time to measure all of the bigger pieces, add the grommets, add them all to the vests and add the bottom strip of vinyl – not to mention adding all the 20 tiny pieces after that – but we really liked the way it looked in the end!
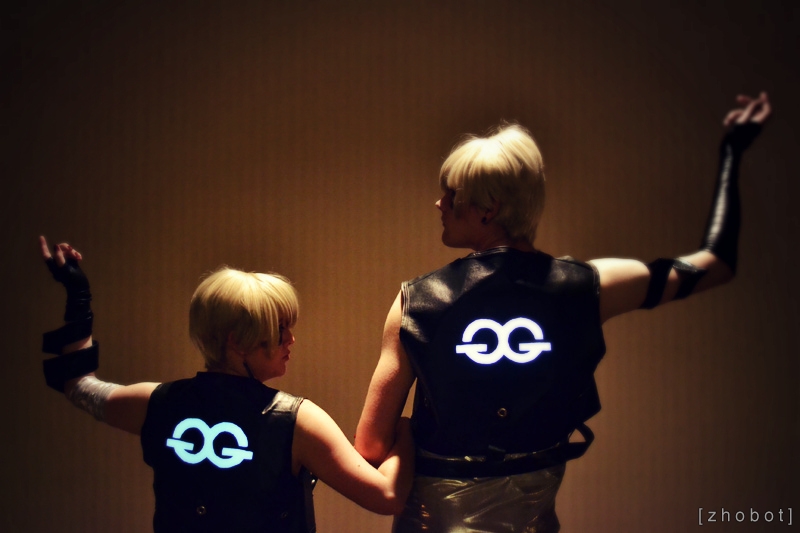
For the logo, we wanted something fun. In the game, their logo on the backs of their vests look gray/silver. Before we even started the costumes we thought, they’re flashy, why not have it light up somehow? Nate had always wanted to do stuff with EL lighting, so we figured this might be a good chance. It took us a while to find panels that were white and that would be the right size for the logos, but we did after a lot of searching!
We hesitated on adding them because we were still afraid of the middles of the GG’s not being able to hold their own and ended up bringing them to con with us. While being lazy in the room one morning, Nate took the Xacto knife he brought and finally cut the logo out of the lining as well, adding the EL panels in with the only thing we had with us – duct tape!
We realized this was a good thing though because we didn’t want the panel in there permanently (with glue, etc.) in case we needed to replace it. We attached the battery pack to the inside of the vest under our arms and it worked out perfectly. Originally we were going to have the battery pack in between the vest and the lining, but since the lining was ironed on instead of sewn, we couldn’t. It’s alright though cause it’s not visible when it’s under our arm!
We ended up getting these on late Sunday night of Dragon*Con, putting on the makeup and trying to figure out how to keep those pesky spiral leg pieces on! Those are the things we need to fix the most, we think. We WERE planning on wearing these to Katsucon in February… but now we have Kerith and Jaryn’s Dance Central 3 outfits to make (woooo!) – so keep an eye out for those! 😀