Boo! [DIY]
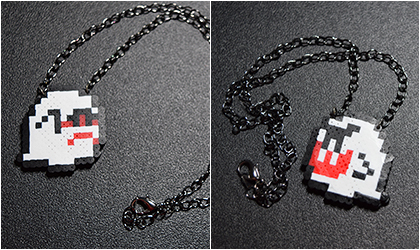
I have a shirt that has a Boo on it — scared Boo on the front and sneaky-coming-to-bite-Mario’s-ass Boo on the back — because it’s Boo and I love Boo. He’s up there with Luigi, Shy Guy and Toad in my “favorite characters from the Super Mario Bros. series” list. I also love messing around with meltable beads. I have all kinds of colors and sizes and when I originally made this necklace, Perler wasn’t making small beads so I had to order tiny ones from the U.K. Perler is making mini-beads now so this tutorial will be made using those! They can be found at Michael’s or pretty much any craft store where you can find Perler beads.
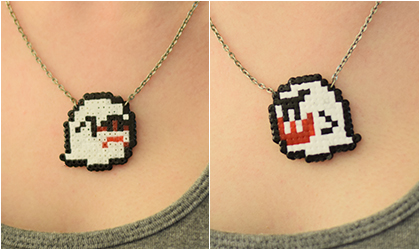
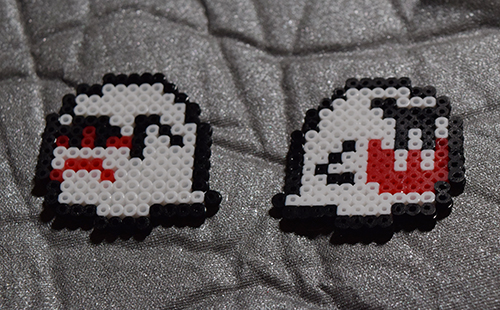
The necklace is like the shirt — scared Boo on one side and sneaky-coming-to-bite-Mario’s-ass Boo on the other — so you can use the necklace to share how you’re feeling by wearing it on whichever side is applicable that day! 😉
Here’s what you’ll need to make this necklace!:
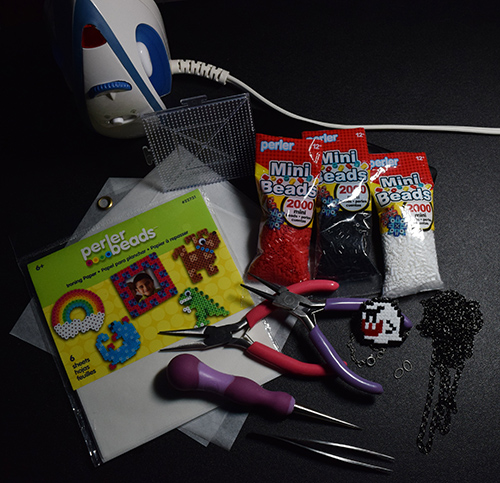
-
- → mini Perler beads (112 black, 30 red, 160 white — they come in packs of 2000 so you should be set with one pack of each)
- → tweezers (very tiny ones! Perler sells tweezers especially for the small beads. Look how tiny the tips of the tweezers are! That’s the size you’ll need!)
- → mini-bead pegboard
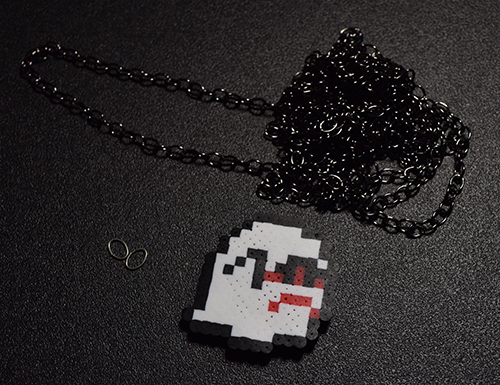
- → some sort of chain for your necklace
- → 2 jump rings
- → jewelry pliers
- → Perler ironing paper (a small sheet of this is included in the mini pegboard pack)
- → an iron
- → a surface to iron on (not pictured)
- → hot glue gun (not pictured)
- → a pin or an awl (pictured, but possibly not needed — you’ll see why!)
Let’s get started!
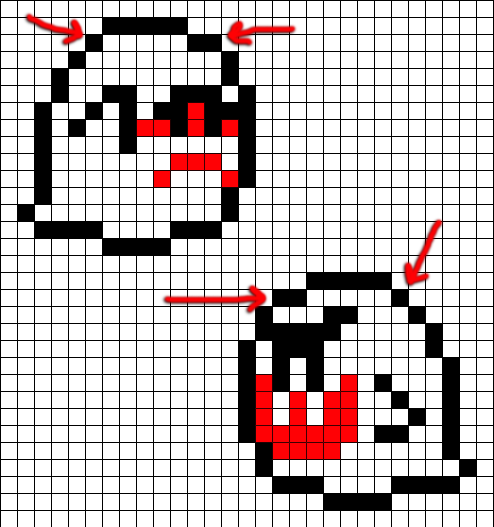
1.) Here are the patterns you’ll be using for the front and back of Boo! Put these somewhere where it’s easy to see while you work (whether you want to keep them on your screen cause you’ll be working in front of your computer or tablet or you want to print them out — whatever is easiest for you since you’ll be looking back at them constantly)! I’ve marked with arrows the places you’ll be putting in the jump rings.
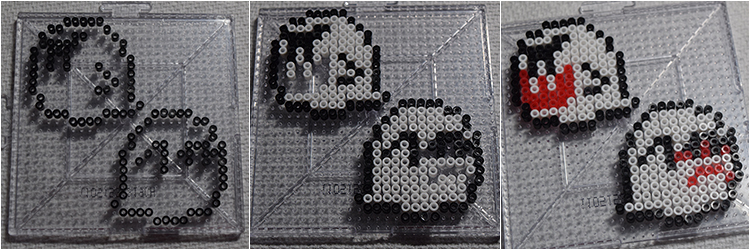
2.) You can fit both on one mini board if you place them right — it’s up to you if you want to do one or both at the same time. It’s also up to you how you want to put the beads down. I put the outline in the black beads down first, then add the other black beads needed. Then I move on to the white and finally the red, as you can see in the photos below. If it’s easier for you to go a row at a time, picking up and placing the color bead you need as you get to it, that works as well! 😀
(Note: I also like to do this work on a paper towel so that it’s easy to fold it up and funnel the extra beads I poured out back into the bag when I’m done. Picking up a bunch of tiny beads gets really old, really fast.)
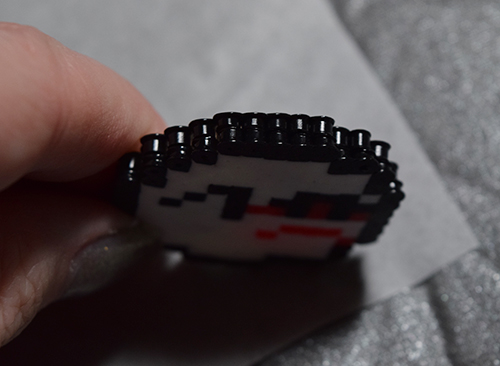
3.) Be very careful once you get all the beads on the board — one knock and they’ll all go flying! Carefully move the board over to your ironing surface and place one of the sheets of ironing paper over the board and beads. Iron over the designs slowly, making sure to check here and there as you’re ironing. When the beads fuse together, they’ll show through the ironing paper. The places marked with the arrows on the pattern are where the jump rings are going, which is what will hold Boo to the chain. Don’t iron over those specific beads too much. You want them to fuse to the others but you don’t want to close the holes in them so completely that you can’t get the jump rings through (or be able to open them back up a bit with a pin or awl).
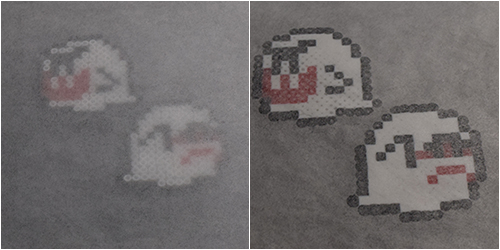
4.) Once you have one side ironed (these are the sides that will show), gently pull up the paper. The Boos should be stuck to the paper and come off of the board very easily and you should be able to turn the paper over with them still stuck to it to look at the back. As you can see, on the backs the beads aren’t fused together. It’s up to you whether or not you want to put the second piece of ironing paper over the back to fuse the back parts of the beads as well. The backs of the Boos are going to be hot glued together so it might not be needed as much, but I ironed the backs for extra hold.
5.) Hot glue the backs of the Boos together so you have a tiny bead Boo sandwich. Make sure the holes that are marked on the pattern meet up so you can get the jump rings through them!
6.) Take your jewelry pliers and open the jump rings, then slide them through the holes marked on the pattern. I mentioned needing a pin or an awl or something of the sort if the holes on the marked beads got fused shut too much. If they did, just carefully poke the holes back open enough for the jump rings. Detach the middle of the chain from itself (where the Boo will go) and then attach the two sides of the chain to the jump rings on Boo. (For this tutorial necklace, I started with a really long chain that wasn’t part of an already made necklace chain, so I also had to attach the jump rings and clasp on the back. You should be able to find chain necklaces with clasps already on them in craft stores if you don’t want to deal with adding the clasp!)
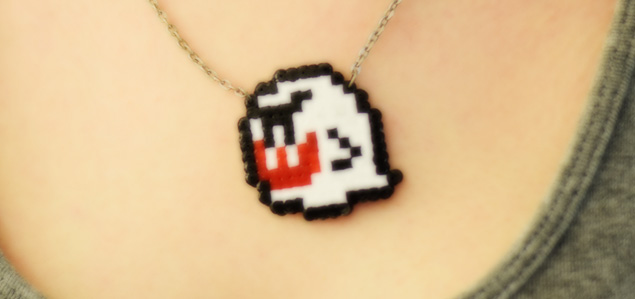
7.) Wear your necklace — pick a side to show off! 😉